Showing posts with label needed. Show all posts

Monday, April 23, 2012

Firefox AutoCorrect?

http://www.technobuffalo.com/wp-content/uploads/2011/03/firefox-logo-browser.jpgSo this afternoon while typing several lengthy emails to various employers asking for internships, family about summer plans and teachers about coming exams, I was struck by a glaring gap in my technology. My phone, an Android running Pantech Crossover, will correct i to I, cant to can't etc. Even in just keyboard non-swype mode it will make all the grammatical changes necessary to keep me from looking like a four year old with no knowledge whatsoever. My browser(Firefox) however is for some reason incapable of even capitalizing the next letter after a period. Feeling slightly disgruntled I searched for an add-on that would do simple things like this. Not even spell correction just adding apostrophe's and shifts. Things I commonly forget to add due to my own negligence in typing lessons. But lo! two hours of time could uncover nothing but threads asking for one. Mozilla for the first time in my life you have failed me...

Now before anyone says learn to type I just want to say that usually i have enough trouble just keeping up with my own train of thought to just put it on paper let alone capitalize. Hence most code I post lacks camel-case notation...who needs common conventions anyways? Just use descriptive enough variable names...

Saturday, October 9, 2010

Xbox 360 Mod (42 images)

Hey guys. Im going to be showing you my Xbox 360 console modification today. It took me a little under 3 hours to do mostly because i had no guides. But now thats changed! before you try and copy this or open your box at all please note the following:
IT WILL VOID YOUR WARRANTY AND IF YOU GET RED RINGED YOU WILL NOT BE ABLE TO GET A REPLACEMENT
Ok so here we go!
Required Materials:
  • Knife
  • Torx Screwdriver Set
  • Bobby pin
  • Toothpick
  • Xbox
  • Plexiglass
  • Edging
  • Spray Paint 
  • Double sided Tape
  • Dremmel or glass cutter
  • Saw
  • Super Glue to reattach feet
Ok so first assemble all of the materials.
Super glue bobby pin and torx driver

make sure you use a torx head. looks a bit like * <- that

This is the plexiglass and the edging

double sided sticky tape and knife

close up of edging

this is the site where i got the glass and the edging. make sure you get 360 edging


 Ok Now you have everything! Time to start opening up the xbox.
First turn your box upside down
next slowly pry off the faceplate. It should come off pretty easily


Look through the holes and you should see gray tabs that release the gray cover.

Push them in with the bobby pin while applying gentle upward pull on the gray cover

Keep going on alternate sides untill you get them all. You may have to remove one of the feet but you can glue them on later. Plus unless you want to paint them you should remove them too.

flip it over so that we can do the one where the HD goes

Put the screwdiver though this hole and try and lever up the tab. It will probably take a bit of fishing

Next pull uo on this end while you push more tabs though the vents.


Heres one of those tabs

On this one there is a tab behind the foot so just pry off the foot and save it

Now both gray things should be off.

lay it down and notice the 7 slot sin the back. 4 here

and 3 here.

use a toothpick to push them in till you hear a click and then hold them open with a screwdriver

This is honestly the most annoying part.

keep going

once you have all 7 and have them wedged ipen move to the front and open these tabs. pretty easy just pry.

Now you should see this. unscrew the ones at the corners and save the screws. they should be as long as the whole xbox.

these screws. Now the bottom half of the shell should drop away.

And Now its open! paint the shells them get ready to add a window.
First use the dremel to cut a hole. stop short of the vents and where it starts to curve

cut away some of the supports in the inside so that the glass will rest comfortably

give it some more paint to cover up the cut marks

paint the cut out bit or throw it out. whatever

that metal plate can be kept but i recommend removing it.

take your shell and get ready to cut the window

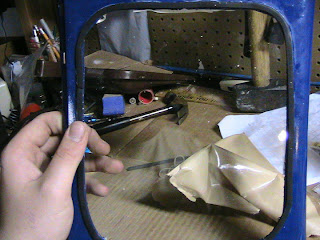
trace out the hole onto the glass

add some corners so that it will be able to go over the lip

use a straight edge. it works better

still using the straight edge begin to score the glass. Use a knife and score ALOT

once its pretty scored hit it lightly with the edge of a table under it. Line the table up with the score line and it should break easily enough.

next put the edging on the fram

let it dry if you used glue then simply reassemble attaching the glass to the shell with the tape. might be a tight fit but it works.
And ytour done! heres some pictures of mine

Thanks for reading! hit the stumble button :D